Saturday, December 31, 2011

One Down, Two to Go

I have been busy working on a series of quilts for my Advanced Independent Study group meeting with Jane Dunnewold. The three are supposed to be finished before the end of February when the group meets again. The one that is totally finished is called Flying Bikinis (named by my son). If you follow my blog, you have seen the finished top without the quilting and facing.

I used bias strips surrounding pieced silk sari strips. It is totally hand quilted.
Here is a detail shot. You can see the hand quilting better in this shot.
One of the other pieces is finished except for the facing and mounting onto a canvas; the other is in the process of being quilted. I'm hoping to finish the hand quilting tonight. Then, there is some machine quilting that will need to be done. I'll keep you updated as to my progress. Wish me luck on getting the other two totally finished before the deadline. I seem to be REALLY good at getting things started...not so much on the finishing.

Thursday, December 29, 2011

I Hit the Jackpot!

My kids got me great gifts for Christmas. Among them were three books I had wanted for quite some time. The first is Alisa Burke's "Sew Wild." 
I sat down and read this book in one sitting. It is a great book about creating with stitch and mixed media. If you are interested in creating your own personalized cloth, this book is for you. It covers stamping, painting, writing, spraying, stitching, doodling, drawing, screen printing, monoprinting, stenciling, masking, creating a pattern with glue resist, and discharging. It also includes a section with projects and a bonus DVD which shows demos of the techniques in the book. I love it.

My other two books cover eco/natural dyeing. The first is India Flint's "Eco Colour." I have spent a lot of time reading blogs about dyeing with natural plants. Nearly everyone refers to India Flint when they speak of botanical dyes. I have been wanting to experiment with this technique, because I love the unique colors and patterns that can be achieved with natural dyes. Now this is one beautiful book. The photos and explanations are fabulous. I can't wait to delve into it further and actually try some natural dyeing.

The third book is Sasha Duerr's "The Handbook of Natural Plant Dyes." 
This book covers the basics of plant dyeing and includes sections on cooking with color, gathering and growing your own color, and a natural dye color chart. I am really enjoying this book.

And, speaking of books, now is a good time to mention another book I REALLY, REALLY love...Rayna Gillman's "Create Your Own Free-Form Quilts." 
I read this book from cover to cover when I received it. When I first read about it, I knew I would love it and pre-ordered it. (I have another of her books, "Create Your Own Hand-Printed Cloth." You should check that book out too.) ...anyway... I'm SO excited to announce that Rayna will be a guest blogger on "And Then We Set It On Fire" for January. A copy of Rayna's book was just given away on that blog. We will be working on "Reinventing UFOs with Strips and Bits" from Page 66 of her new book (in case you want to follow along). Even if you don't want to actually reinvent one of your own UFOs, I think you'll find the posts interesting. I already have one UFO in mind and am sure I'll find many more to "play" with as I do the project along with the other artists on that blog. If you have "orphan" blocks and/or UFOs you aren't happy with (or will never finish), come play with us. Just click on the link in this post or click on the "And Then We Set It On Fire" icon on the top right-hand side of this page.

If you have these books, let me know what you think of them. If you don't, do they look like something you might like to check out?

Tuesday, December 27, 2011

Facing a Quilt--Facing Method II

FACING METHOD II

A little while back, I posted "FACING METHOD I" as it was taught to me by Marti Plager. I promised I'd post "FACING METHOD II." Well, it has taken me a bit longer to get it posted than I thought it would, but here it is.

Marti Plager spent a day teaching me two different methods of facing quilts. You can find Method I by clicking on the link. You can check out Marti's quilts on her website at http://www.martiplager.com/. While you are there, take a close look at the corners of her quilts. They all look great. I owe her a big thanks for so generously sharing her time and knowledge with me.

First, here is a bit of information you need to know.
  • Marti says this facing method makes a corner that is a bit more square than when using "FACING METHOD I," but there may be more bulk to deal with in the corners. 
  • I used a walking foot to put the facing strips on my quilt.
  • For this method, sew the top and bottom facings on first.

METHOD II
1)   Square up the quilt.

2)   Cut facing strips 2 ½” wide. They should be cut the same length as the top and bottom measurement. You can either cut them to the correct length to start with or you can sew the strip on and then cut it to the correct length.

3)  Pin and stitch the top and bottom facing strips using a 3/8” seam allowance. The picture shows the facing strip cut to length and already sewn to the bottom of the quilt. The top facing strip has been sewn on and the left side has been cut to the correct length. I still need to cut the right side to the proper length. (This particular quilt has a horizontal alignment.)
4)  Press the top and bottom strips away from the quilt. 
  (This photo shows one of the strips pressed away from the front of the quilt.)

5)  Edge stitch the top and bottom facing strips approximately 1/8" from the seam with the right side of the quilt up as described in Method I. (Photo #10 shows what edge stitching on a facing strip looks like.)

6)  Press the long raw edge under approximately ½”. (You can see that I have done that in Photo #4.)

7)  Once you have top stitched the top and bottom facing strips, press both strips to the back of the quilt and pin. Be sure none of the facing strip shows on the front of the quilt.
8)  Cut the side facing strips so that they extend about an inch off both sides of the quilt. (See Photo #9.)

9)  Pin and stitch to the sides using a 3/8” seam allowance.
 This picture shows the side facing strips after they have been cut, stitched, and pressed away from the quilt.

10) Iron these facing strips away from the front.  Turn the quilt over so that the right side is facing you and edge stitch 1/8" from the seam like you did in #5.
 (This picture shows a facing that has been pressed away from the quilt and edge stitched 1/8" away from the edge of the seam.)

11)  Press the long raw edge under approximately ½”. (Like you did in #6.)

12)  Turn the facing strips to the back of the quilt (top and bottom pressed in first) and press so none of the facing strip fabric shows on the front.
 (In this picture, I have pressed the top and bottom strips to the back. I have also pressed the right-hand side strip to the back. I have yet to press the left-hand side strip to the back.)

13) If you find that you have more than about an inch of fabric extending off the strips, trim those to approximately an inch now. Turn the extended edges of the side strips (You can see those clearly in Photo #12.) under till they are even with the edge of the quilt. Pin. (You can trim a bit of the corner away if there is too much bulk. If you do that, though, be VERY careful not to cut the facing strip—that is easy to do—ask me how I know!)
 (This photo shows how the edge might be trimmed if necessary.)
(This photo shows the side facing strips after they have been pressed to the back and the short edges have been turned under and pinned.)

14)  Hand stitch the facing strip to the back of the quilt. Be sure your stitches do not go through to the front of the quilt.
 (This is the finished quilt.)

Friday, December 23, 2011

Miscellaneous Pieces from the Boston Museum of Fine Art

I want to take this time to wish those of you that celebrate Christmas a Merry Christmas. To those of you that celebrate other holidays...Happy Holidays. Enjoy the time you have with family and friends. I'm so very thankful for both. I also want to take this time to let you know how much I appreciate you reading my blog. I appreciate the comments and I especially appreciate my "Followers." Now here's a little eye candy.

I just found these pictures and couldn't resist posting them. I just loved this feather headdress. I think the color and texture have something to do with it. Anyway, it was made in the mid-20th century of feathers, vine, fiber, cotton cloth, and string. "During ceremonial occasions, rulers and royal officials in the many kindoms of the Bamileke in Cameroon wear flamboyant headdresses made from feathers, including the red tail feathers of the gray parrot. Such hats also appear as part of the costume of masked performers. The feathers attach to a mesh cap, and the entire headdress can be tured inside out so that the fiber cap protects them." (Quoted information comes from the museum.)
Here is a close up--gorgeous.
As I was being led around the museum by a guide, she quickly took me through a room that contained this quilt. I had her stop so I could take a  quick picture. (I was sure I'd never find that room again!) I don't know any information about it. Is this what you'd call a story quilt?
These "rugs" were in the room before I got to the Chihuly glass exhibit. I'm still not sure why they were there; they really had nothing to do with the exhibit. I loved the colors, though.

Sunday, December 18, 2011

I've Got a New Toy

I must admit, I'm such a tech junkie. I LOVE, LOVE, LOVE my iPad; I'm lusting after the newest smart phones; and I really like that sometimes I can even find an application that I can use for my art. Last week I purchased Inspire Pro ($7.99) for my iPad. Inspire Pro is a paint/draw/sketch application. It can simulate wet oil paint on canvas which allows blending effects with five real kinds of brushes, and there is a non-realistic paint mode which allows drawing and sketching as well as painting. It is VERY cool. I also purchased a Rocketfish--Advanced Series stylus from Best Buy Mobile ($17.99).

I imported a photo of my quilt top into the program and drew different quilting designs onto the photo using the stylus. "Prayer at Sunset" is one quilt in a series I'm working on for my Advanced Independent Study sessions with Jane Dunnewold. I just can't decide what quilting I want to do on this piece, but using this software to audition the quilting before I actually do it should make it easier for me. Here are two examples. (Do you like either of them? One more than the other?)

Of course, the quilting won't show up as much as it does on these pictures; the thread color will match the background. I don't know about you, but I really find this much easier than the method I used to use...drawing a design with markers on a piece of plastic placed over the quilt top.

There are SO many other ways to use this software. I can't wait to experiment with it some more.

Friday, December 2, 2011

Working on Being an Artist

At the end of September (2011), I attended my first meeting of a group (called an "Advanced Independent Study" group) with Jane Dunnewold and a group of really talented fiber artists. We met for three and a half days at the Kentucky Museum of Art and Craft in Louisville, Kentucky. Each artist in the group has what we in education call an "individualized education plan." I can share my plan with you.

I have done traditional quilts using a pattern for most of my life, so I am pretty good at most traditional techniques. Because of that, I just didn't feel challenged any more and felt like something was missing. I needed to make a change. Then in the last couple of years, I made a few original pieces--very few. Some were traditional and some would be considered "fiber art." I worked through Lyric Kinard's book, "Art + Quilt," and posted the results here on my blog. I learned a lot by doing this, but when it came time to move from doing lessons and taking workshops to actually producing original work I was paralyzed. (It is a scary thing to venture out on your own.) I had real trouble starting to work on new pieces, because I couldn't focus on one theme, method, or technique. I admit I am a "technique junkie." I am like a "kid in a candy store;" I like everything about fiber art--traditional, non-traditional, primitive, contemporary, surface design, embellishment, beading, dyeing, painting, etc. There just isn't any part of it I DON'T like. This makes it VERY difficult for me to find a focus to my work.

This AIS Group really fit the bill for me. In this group, I was required to define my artistic strengths, weaknesses, and what I like to do. Jane then told me that to get started I have to align my strengths with what I want to accomplish. For now, that means I must narrow my focus--I have to make some decisions. I was pleasantly surprised to find that I actually have a style along with the beginning of a series of work. I showed three pieces and, to my amazement, Jane saw a distinctive style within them. She (and the group) helped me see what I wasn't able to see myself.

So...I'm embarking on a new, scary adventure. I'm making original "art." (I won't totally give up making things that aren't my own original designs. Sometimes I NEED the repetition of following a pattern to calm me. It serves as sort of a meditation to me--much like hand quilting, well any kind of hand work, does for me.) It is much harder and more time consuming than I thought it would be. It is tremendously hard to "put myself out there," but I think doing this scary thing is good for me. I'll keep you posted on my progress.

Tuesday, November 29, 2011

Long Time--No Post!

I have to apologize for not posting consistently. I have been very busy (as I'm sure you are). I will try to do better. I HAVE been working--I've worked on Christmas gifts (I couldn't post about), I've worked on my pieces for my Advanced Independent Study Class with Jane Dunnewold (nothing I could post there either), I've worked on hand stitching a Crab Apple Hill Halloween piece (not finished...nothing to post), and I've worked on the December technique for the technique blog I belong to (And Then We Set It On Fire). I really can't post pictures of that here, but do check it out here--And Then We Set It On Fire. I will be posting it on December 1, 2011. Please check it out and try the technique with us.

I have also updated "Upcoming Quilting/Fiber Arts Events." There is a really nice new exhibit in Indy. Check it out if you get a chance. I recently joined Studio Art Quilt Association, and the exhibit has pieces from SAQA members along with members of the Surface Design Association. I don't have anything in this exhibit, but I may get brave enough to actually show something one of these days.

Thursday, November 3, 2011

Facing a Quilt--Facing Method I

FACING METHOD I

First, I want to thank Marti Plager for helping me with this tutorial. She spent a day teaching me two different methods of facing quilts. I have always admired the nice looking facings she has on her quilts, and I've wanted to learn her methods for quite some time. You can check out her quilts on her website at http://www.martiplager.com/. While you are there, take a close look at the corners of her quilts. They all look great.

This facing method makes a slightly rounded corner. I used a walking foot to put the facing strips on my quilt. ALWAYS square up your quilt before beginning the facing process.

1)  Decide the orientation of the quilt. For this method, you will be sewing the strips for the facing onto the sides first.

2) Measure the sides of the quilt. Cut two 2 1/2" facing strips the length of this measurement. 


3)   Iron under 1/2" on one long side of each facing strip.

4)  On the wrong side of each fabric strip (long edge--opposite the turned under edge), mark a dot at both corners 3/8” up from the long edge and 3/8” in from the short edge. This will serve as your pivot point when sewing.

5) Pin the facing strips to the sides of the quilt. The dots should be along the edge of the quilt; the turned under edge should be toward the quilt.
6)  Using a 3/8” seam allowance, sew the two side facing strips to the quilt. Beginning at one of the short edges, sew down to the marked dot, pivot at the dot, continue sewing down the long edge of the strip, pivot at the dot, and continue sewing the short edge.
  (I apologize that this picture is a bit blurry. It is the best one I had that showed this step. You can see the turned-under 1/2" long edge just above the pin in this picture. Also, you can see the "dot/X," where you will be pivoting, at the corner.)
 (This is what it looks like after both long facing strips have been sewn.)

7)  Cut the top and bottom facing strips (2 1/2" wide) just long enough to cover the turned under edges of the long facing strips and iron under 1/2" on one long side of each of these strips.
 (This picture shows one facing strip at the top of the quilt and one on the table above the quilt. Notice the length--long enough to cover the turned under edges of the side facing strips.)

8)  Pin the facing strips to the top and bottom and stitch using a 3/8” seam allowance.

9)  Iron the top and bottom strips away from the quilt. Iron the side strips (as best you can) away from the quilt. (The side strips are hard to iron away from the quilt because the corners are stitched. Do the best you can.)
  (This picture shows the facings ironed away from the quilt.)

10) Turn the quilt so the right side is up. Using a 1/8" seam, edge stitch the top and bottom facing.
  (This picture shows the edge stitching on one of the top facing strips.)

11) Edge stitch the side facings starting as far into the corner as you can. Continue to stitch down the straight away and into the next corner as far as you can without distorting the piece.
  (In this picture, one of the side facings is being edge stitched. Edge stitch as close to each corner as you can. This is a bit awkward because the corner has been sewn, and you can't open it up all the way.)

12) Trim the corners. 
(This picture shows my friend trimming one of the corners of her quilt.)
(This is what one of my corners looked like after I trimmed it. This is a scary thing to do!)

13) Use a point turner to turn the corners. Be careful not to poke a hole in the corner.
 14) Iron so that none of the facing fabric shows on the front of the quilt.

 (This is what the back of my quilt looked like when I had all the facing strips ironed away from the front of the quilt.)

15) Hand stitch the facing strips to the back of the quilt. Be sure your stitches do not go through to the front of the quilt.
  (This is the finished product. Check out the corners. The quilt is actually square--it looks a bit skewed here, because I'm not a very good photographer!)

Wednesday, October 19, 2011

Quilt Retreat and an Upcoming Facing Tutorial

Last weekend I attended a quilting retreat (put on by Lora Nale) here in my hometown. About forty women descended upon the Days Inn for a three-day retreat. We had lots of food, fun, uninterrupted quilting time, and camaraderie. It was really nice to meet some new quilters and spend time with old friends. I had been busy working on projects for my Jane Dunnewold class and my post for the "And Then We Set It On Fire" blog, so (needless to say) I had nothing ready to take to retreat. I ended up frantically cutting out some "modern quilting" blocks--very simple using "modern" fabric. I had won lots of fat quarters of "modern" fabric and wasn't quite sure how I would use them, so I decided to do a very simple quilt with squares and rectangles. The quilt consists of six different blocks. I also pieced some little blocks that were already cut out and in my retreat bag. Here are samples of some of the blocks.
The "modern" blocks come from the "Fresh Lemon" blog. Be sure to check out the finished "Lemon Squares Quilt." The fabric I used for the "modern" blocks is Joel Dewberry's Deer Valley Fabric Collection from Westminster Fibers Lifestyle Products. I used scraps from my stash (and there is a lot more where that came from) for the little blocks. The "modern" blocks finish 9". The small blocks finish 4".

I mixed the fabrics I won with some Kona Ash fabric I purchased. My bedroom is gray, and I thought the quilt would make a nice bedcover for the spring (like I might ever have it finished by then).

Also, Marti Plager (http://www.martiplager.com/) was kind enough to give me a lesson on how to face a quilt (rather than bind it traditionally). I took pictures and will be posting a tutorial on two different facing methods, so be looking for that later on.

What are you working on? Has the cooler weather put you in the mood to quilt?

Sunday, October 9, 2011

Innovations--A Biennial Textile Event 2011 in St. Louis

A friend and I had the opportunity to visit several of the venues associated with Innovations--A Biennial Textile Event 2011 in St. Louis. The exhibitions in conjunction with Innovations investigate the state of contemporary textile arts. Nineteen nonprofit and private arts organizations join forces to present exhibitions related to fiber art. If you have the opportunity to visit any of these exhibits, by all means go! The exhibits are located all over the city and surrounding areas. 

(Many of the galleries did not allow photographs; if photographs were allowed, I'm showing them.)

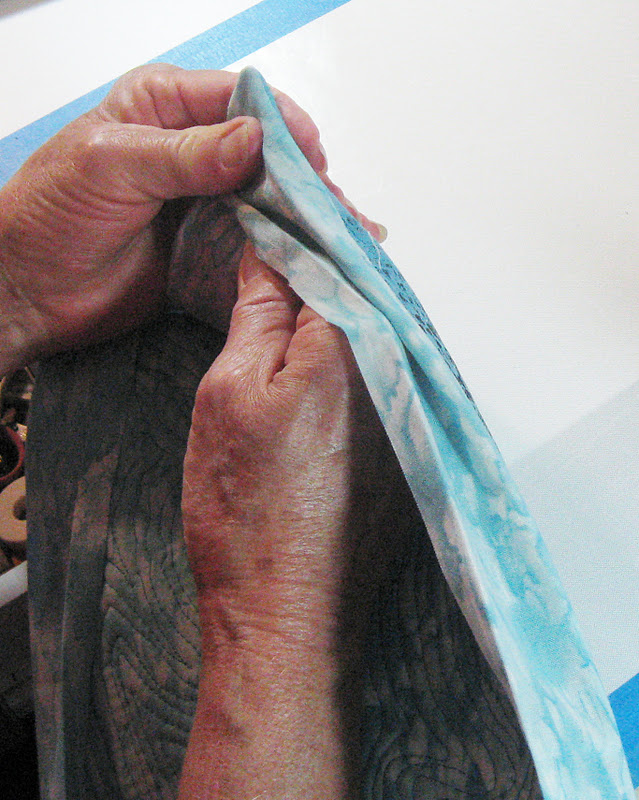
We started our "tour" with Quilt National at The Foundry in St. Charles, MO. The Quilt National exhibit was fabulous; I thoroughly enjoyed it. The thing that made the biggest impression on me was the number of pieces that were hand quilted or used hand stitching as a part of the design. We actually counted; and of the pieces that were there, a quarter of them had hand stitching. I LOVE hand work, so I REALLY enjoyed this.

We spent one day in St. Louis where we visited several galleries including the Duane Reed Gallery, the Sheldon Art Galleries, the Craft Alliance Delmar Gallery, Art Saint Louis, the Craft Alliance/Grand Center, and The Gallery at the Regional Arts Commission. Each had something unique to offer. 

Art Saint Louis has an exhibit called Fiber Focus 2011 that will be available for viewing through October 13, 2011. It features the work of 42 contemporary fiber artists representing eight Midwestern regional states. This exhibit is well worth a visit.

The Craft Alliance/Grand Center only had one piece of fiber art. The piece, by Guerra De La Paz, is called Follow the Leader. It is made up of discarded clothing piled on top of what looks like legs with various shoes/boots. It was very interesting to see this exhibit. We were told the piece is a political commentary on waste and excess.

The exhibit at The Gallery at the Regional Arts Commission was much smaller than many of the exhibits but had several pieces I really liked. Jo Stealey had pieces in the gallery that were made of silk and processed leaves. They were my favorites. If you click on her name (which will take you to her site) and go to her "Nature's Mantle" section, you can see some of the pieces that were in this show. The exhibit at The Gallery is called Textile Variations/New Directions and will be available for viewing until November 6, 20ll.

The Craft Alliance Delmar Loop didn't have the most extensive exhibit, but their gift shop was VERY nice. (I found several things I thought I "needed." I ended up with a pair of earrings.) Nnenna Okore's exhibit, "Shokolo," relies on the use of flotsam or discarded objects, which are transformed into intricate sculpture and installations through repetitive and labor-intensive techniques. Her processes include weaving, sewing, rolling, twisting, and dyeing. Jim Hay's exhibit is called Angels, People, and SMOKE. His quilts are made from Japanese kimono cloth and cloth he has gathered from surrounding countries. Both exhibits are available through October 23, 2011.

The Duane Reed Gallery hosts an exhibit called Doll Sense. All of the pieces are woven. The exhibit, though, that I personally LOVED there was Lanny Bergner's exhibit called Nature's Matrix. Bergner works with mesh (some stainless steel and bronze) along with wire, glass frit, recycled ground plastic, paper, and silicone to create organic sculptural constructions. The pieces are three dimensional and very unique and innovative. Check out his website by clicking on his name. You can see some of the pieces from the exhibit in his gallery there. If I could afford a piece, I would have one! The exhibits there are available through October 15, 2011.

I was allowed to take some pictures at the Sheldon Art Gallery. Ties That Bind:  Art Quilts by Members of the Fiber Artists Coalition is available through December 3, 2011. This exhibition presents a selection of quilted works by members of the Fiber Artists Coalition, in conjunction with the citywide biennial Innovations in Textiles celebration, now in its 9th year. Here is just a small view of what is available to you at the Sheldon.
Shelley Brucar's piece, Stormy, is made of hand-dyed and commercial cottons.
"She #6" is made by Pat Bishop.
"Michigamee" is made by Maggie Weiss. It is made of hand-dyed cotton and silks and was collaged and machine quilted with organza batting. Maggie says, "Creating the illusion of three dimensions on a two-dimensonal surface is a continually captivating process, whether using dyes, paints or fabrics." I love the look of light on the water in this piece.

The Sheldon also has a really nice theater that houses various musical events. We got to take a look at that facility, and I found out that it has gorgeous stained-glass windows.
These are some of the large windows.

These are a couple of the small windows. I loved the colors and design.

All in all, it was a great visit to St. Louis. If you love fiber art, you still have a little time to make the trip. Get going!

Sunday, October 2, 2011

Check It Out

Head on over to my post on "And Then We Set It On Fire" to see my latest experiment into surface design--using "Fugitive Media." While you are there, check out the beautiful work the other members of the blog have done too.

Join us this month when we "set things on fire" using heat to alter fabric and stitch.

Thursday, September 29, 2011

Even the Entrace to the Chihuly Exhibit Was Spectacular

I realize my posts on Chihuly have nothing to do with fiber art, but... I have been so inspired by his work that I may have to incorporate some of the colors, shapes, shadows into my work. How about you?

Everything about Chihuly's "Through the Looking Glass" exhibit at the Boston Museum of Fine Art was top notch--even the entrance. Outside, tall spikes of orange/yellow glass among the grass indicated great things to come.
The first glimpse of the actual exhibit was this wall.
The people in the picture give you an idea of how large the pieces actually are. Here are a few closer pictures of the pieces mounted on the wall. The shadows cast beautiful images.


There were also pieces on the floor.


I love these "hot" colors. If you ever get a chance to check out a Chihuly exhibit, by all means do so!